windows 10

Windows 10 – How To Easily Take A Screenshot

Screenshots have become an integral part of our digital lives, whether for capturing memorable moments, saving important information, or sharing content with others. In Windows 10 taking a screenshot is a simple yet powerful feature that can be utilized in various scenarios. In this guide, we’ll explore the different methods available in Windows 10 to easily capture screenshots, catering to both basic and advanced user needs.

Understanding the Basics of Screenshots:

Before diving into the methods of taking screenshots in Windows 10, it’s essential to understand the different types of screenshots and their uses.

  • Full-screen screenshot: Captures everything displayed on your monitor.
  • Windowed screenshot: Captures only the active window, excluding other open windows.
  • Region screenshot: Allows you to select a specific area of the screen to capture.

Each type of screenshot serves a distinct purpose, providing flexibility based on your requirements.

Windows-10 Using Keyboard Shortcuts:

Windows 10 offers built-in keyboard shortcuts for quickly capturing screenshots without the need for third-party software. These shortcuts are efficient and easy to remember:

  • Full-screen screenshot: Press the “PrtScn” (Print Screen) key on your keyboard. This captures the entire screen and copies it to the clipboard.
  • Windowed screenshot: To capture only the active window, press “Alt + PrtScn.” This action copies the screenshot of the active window to the clipboard.
  • Region screenshot: For capturing a specific region, press “Win + Shift + S” to open the Snipping Tool, then drag to select the desired area. The screenshot is automatically copied to the clipboard and can be saved or edited using the Snipping Tool.

Keyboard shortcuts offer a quick and convenient way to capture screenshots on Windows , ideal for users who prefer efficiency in their workflow.

Utilizing the Snipping Tool:

Windows 10 includes a built-in utility called the Snipping Tool, designed specifically for capturing screenshots and annotating them if necessary. Here’s how to use it:

  • Open the Start menu and search for “Snipping Tool.”
  • Once open, select the desired snip type: Free-form, Rectangular, Window, or Full-screen.
  • After selecting the snip type, drag the cursor to capture the desired area.
  • The captured screenshot will appear in the Snipping Tool window, where you can annotate it using the available tools.
  • Finally, save or share the screenshot directly from the Snipping Tool interface.

The Snipping Tool provides additional flexibility and customization options compared to basic keyboard shortcuts, making it a versatile tool for capturing and editing screenshots.

Windows 10

Introducing Snip & Sketch:

In addition to the Snipping Tool, Windows 10 introduced Snip & Sketch, an enhanced tool for capturing and annotating screenshots. Here’s how to use it:

  • Press “Win + Shift + S” to open Snip & Sketch, or search for it in the Start menu.
  • Snip & Sketch offers various snipping options: Rectangular Snip, Freeform Snip, Window Snip, and Full-screen Snip.
  • After capturing the screenshot, it will be automatically saved to the clipboard, and a notification will appear, allowing you to annotate or share it directly.
  • Alternatively, you can access the screenshot from the Snip & Sketch interface, where you can annotate it using the available tools.
  • Snip & Sketch also offers additional features such as delayed snip and touch-friendly markup tools, enhancing the screenshot-taking experience.

Snip & Sketch provides a modern and intuitive interface for capturing and editing screenshots, catering to users who prefer a more streamlined approach.

Leveraging Game Bar for Gaming Screenshots:

For gamers, Windows 10 includes a feature-rich tool called Game Bar, which not only allows for capturing screenshots but also recording gameplay footage. Here’s how to use it:

  • While playing a game, press “Win + G” to open the Game Bar overlay.
  • Click on the “Screenshot” button (camera icon) to capture a screenshot of the game window.
  • Alternatively, use the keyboard shortcut “Win + Alt + PrtScn” to capture a screenshot without opening the Game Bar overlay.
  • The captured screenshots will be saved to the “Captures” folder under Videos in your user profile directory.

Game Bar offers convenient functionality for gamers to capture memorable moments during gameplay effortlessly.

Exploring Third-Party Screenshot Tools:

In addition to the built-in tools provided by windows 10, there are numerous third-party screenshot utilities available that offer advanced features and customization options. Some popular options include:

  • Green shot: A lightweight and open-source screenshot tool with advanced editing features and customizable hotkeys.
  • Light Shot: A feature-rich screenshot tool with easy sharing options and built-in image editor.
  • Snagit: A comprehensive screenshot and screen recording software with advanced editing capabilities and cloud integration.

Third-party screenshot tools cater to users with specific requirements or preferences for additional features beyond the native windows 10 options.

Conclusion

Taking a screenshot in windows 10 is a simple yet versatile task that can be accomplished using various built-in tools and shortcuts. Whether you prefer the convenience of keyboard shortcuts, the flexibility of the Snipping Tool, the modern interface of Snip & Sketch, or the gaming-focused functionality of Game Bar, Windows 10 offers a solution for every user’s screenshot needs. Additionally, third-party screenshot tools provide advanced features for users seeking more customization options. By mastering these screenshot methods, you can effortlessly capture and share moments from your windows 10 experience.

Microsoft Office 2019 Professional Plus

Why Purchase Microsoft Office 2019 Professional Plus ?

Microsoft Office 2019 Professional Plus ! Being productive and efficient are crucial in today’s fast-paced digital environment, and having the correct tools at your disposal may make a big difference. Microsoft Office is one of the many software suites available, and it has long been a mainstay for both consumers and organizations. Microsoft keeps improving and refining its Office suite with each new version, meeting the changing needs of customers all over the world.

Microsoft Office 2019 Professional Plus is one such product; it’s a feature-rich bundle that gives consumers access to a wide range of features and capabilities. We explore the benefits of purchasing Office 2019 Professional Plus in this blog post, which is a wise move for anyone looking to increase productivity and streamline workflow.

What is Microsoft Office 2019 Professional Plus?

Microsoft Office 2019 Professional Plus is a premium suite of productivity software by Microsoft, tailored for professional use. It encompasses essential applications like Word for word processing, Excel for spreadsheets, PowerPoint for presentations, and Outlook for email management. This edition introduces advanced features, such as enhanced inking capabilities, real-time collaboration, and improved data analysis tools. With a focus on security, compliance, and flexible deployment options, Office 2019 Professional Plus ensures efficiency and reliability for businesses and individuals alike. It’s a comprehensive solution designed to empower users to create, collaborate, and communicate effectively in today’s fast-paced digital landscape.

1. Comprehensive Suite of Applications:

The core of Office 2019 Professional Plus is a comprehensive suite of apps designed to meet a wide variety of needs and responsibilities. This suite includes everything you need for word processing, spreadsheet management, presentations, and email correspondence. Users may easily create, edit, collaborate, and communicate with standard programs like Word, Excel, PowerPoint, and Outlook. Office 2019 also adds new features and improvements to these programs, enhancing their usability and functionality even further.

2. Enhanced Productivity Tools:

Microsoft Office 2019 Professional Plus incorporates a host of productivity tools aimed at streamlining tasks and optimizing efficiency. Features such as improved inking capabilities in Word and PowerPoint allow users to express their ideas more intuitively, whether it’s jotting down notes or annotating documents. Likewise, enhancements in Excel, such as new functions and data analysis capabilities, empower users to glean insights from their data more effectively. These productivity-focused enhancements are designed to save time and effort, enabling users to focus on what matters most.

Microsoft Office 2019 Professional Plus

3. Modern Collaboration Features:

In today’s collaborative work environments, the ability to work seamlessly with others is paramount. Microsoft Office 2019 Professional Plus introduces several features geared towards facilitating collaboration and teamwork. Real-time co-authoring in Word and PowerPoint allows multiple users to edit documents simultaneously, fostering greater collaboration and reducing versioning conflicts. Furthermore, integration with cloud services such as OneDrive enables users to store, share, and access documents from anywhere, on any device, ensuring that collaboration knows no bounds.

4. Enhanced Security and Compliance:

Owing to the growing importance of data security and compliance, Office 2019 Professional Plus comes equipped with powerful tools to protect sensitive data and guarantee legal compliance. Data breaches are less likely when programs like Word, Excel, and PowerPoint have built-in data loss prevention (DLP) features that stop private information from being accidentally shared. Moreover, additional protection is added by sophisticated encryption technologies and rights management controls, which guarantee that your data is always safeguarded.

5. Flexible Deployment Options:

Whether you’re a small business looking to deploy Office across your organization or an enterprise with complex IT requirements, Office 2019 Professional Plus offers flexible deployment options to suit your needs. With both traditional perpetual licensing and subscription-based models available, businesses can choose the licensing model that best aligns with their budget and preferences. Additionally, centralized deployment and management tools, such as Microsoft Endpoint Configuration Manager, streamline the deployment process, making it easier for IT administrators to manage and maintain Office installations across their organization.

6. Long-Term Support and Stability:

Office 2019 Professional Plus offers dependable long-term support for enterprises that prioritize consistency and predictability. Because Office is a permanent version, users can depend on the program for many years to come because security upgrades and bug patches are regularly released. Businesses and organizations can rest easy knowing that their vital productivity tools will continue to be safe and secure without requiring regular upgrades or migrations thanks to our long-term maintenance cycle.

7. Value for Money:

Office 2019 Professional Plus comes with an upfront expenditure that may appear high, but the value it offers makes up for most of the price. Office 2019 Professional Plus is a wise investment for both individuals and organizations because of its extensive array of programs, improved productivity tools, contemporary collaboration features, strong security and compliance capabilities, flexible deployment options, and long-term support. Furthermore, Office 2019 Professional Plus has a strong value proposition in comparison to other options or subscription-based business models by offering a robust and dependable productivity suite at a one-time price.

Conclusion

The release of Office 2019 Professional Plus is evidence of Microsoft’s dedication to providing users with the resources they require to thrive in the fast-paced and cutthroat environment of today. Office 2019 Professional Plus is more than just a software suite; with its extensive application suite, productivity-enhancing features, modern collaboration capabilities, strong security and compliance measures, flexible deployment options, and long-term support, it’s a productivity and innovation catalyst. Whether you’re a company trying to streamline processes or an individual trying to reach your greatest potential, making the investment in Microsoft Office 2019 Professional Plus now will pay off in the long run.

Microsoft Visio 2021 Professional Free Download & Activation

Microsoft Visio 2021 Professional Free Download & Activation

Microsoft Visio is a mainstay in the field of visual communication and data visualization, helping users to simplify complicated concepts into easily understood diagrams. The toolkit has developed with the release of Microsoft Visio 2021 Professional, providing professionals with even more powerful tools. This post examines the value of Microsoft Visio, looks at some of its latest features, and walks you through the free download and activation procedure.

Understanding the Significance of Microsoft Visio:

Microsoft Visio has long been recognized as a versatile tool for creating diagrams, flowcharts, org charts, floor plans, and more. Its intuitive interface and extensive library of shapes make it an indispensable asset for businesses, educators, and individuals alike.

Simplifying complicated ideas is one of Microsoft Visio’s main benefits. Visio offers a visual canvas to efficiently communicate ideas, whether you’re presenting project deadlines, creating network architectures, or outlining business processes.

Additionally, Visio easily interfaces with other Microsoft Office programs, facilitating smooth workflow integration and collaboration. Its cloud service compatibility improves accessibility even further and makes team member real-time cooperation easier.

Exploring the New Features of Microsoft Visio 2021 Professional:

With the release of Microsoft Visio 2021 Professional, users can expect a host of new features and enhancements aimed at streamlining the diagramming process and enhancing productivity.

Enhanced Collaboration Tools: Microsoft Visio 2021 Professional introduces new collaboration tools that enable team members to work together seamlessly on diagrams in real-time. With features like co-authoring and commenting, users can collaborate more effectively, leading to improved workflow efficiency.

Expanded Shape Libraries: The latest version of Visio boasts an expanded collection of shapes, including industry-specific icons and symbols. Whether you’re in architecture, engineering, or IT, you’ll find a comprehensive array of shapes to bring your diagrams to life.

Improved Data Connectivity: Data visualization is made easier with Visio 2021 Professional’s improved data connectivity features. Users can now link diagrams to external data sources such as Excel spreadsheets or SQL databases, allowing for dynamic updates and insights.

Enhanced Accessibility Features: Accessibility is prioritized in Microsoft Visio 2021 Professional, with improved support for screen readers and keyboard shortcuts. These enhancements ensure that Visio remains inclusive and accessible to users of all abilities.

Streamlined User Interface: The user interface of Visio has been revamped for greater intuitiveness and ease of use. With simplified navigation and customizable toolbars, users can focus on their diagrams without being hindered by unnecessary clutter.

Microsoft Visio 2021 Professional Free Download & Activation

Downloading and Activating Microsoft Visio 2021 Professional for Free:

Now that we’ve explored the significance of Microsoft Visio and its new features, let’s discuss how you can download and activate Visio 2021 Professional for free.

Step 1: Visit the Official Microsoft Website

Navigate to the official Microsoft website and locate the Visio 2021 Professional product page. Here, you’ll find detailed information about the software, including system requirements and pricing options.

Step 2: Choose the Free Trial Option

Microsoft offers a free trial of Visio 2021 Professional, allowing users to explore its features before making a purchase. Click on the “Free Trial” button to initiate the download process.

Step 3: Install the Software

Once the download is complete, follow the on-screen instructions to install Visio 2021 Professional on your computer. Ensure that you meet the minimum system requirements to avoid any compatibility issues.

Step 4: Activate the Trial Version

After installing Visio, launch the software and select the option to activate the trial version. You may be prompted to sign in with your Microsoft account or create a new one if you don’t already have one.

Step 5: Explore Visio’s Features

With Visio 2021 Professional successfully installed and activated, take some time to explore its features and familiarize yourself with the interface. Experiment with creating diagrams, importing data, and collaborating with colleagues to maximize your productivity.

Conclusion:

An important turning point in the development of tools for data visualization and visual communication is Microsoft Visio 2021 Professional. Visio’s improved functionality and simplified interface enable users to express complicated concepts clearly and creatively. Microsoft allows users to explore Visio’s complete features before committing by providing a free trial version. Why then wait? Get Microsoft Visio 2021 Professional now and unlock it to advance your diagramming abilities.

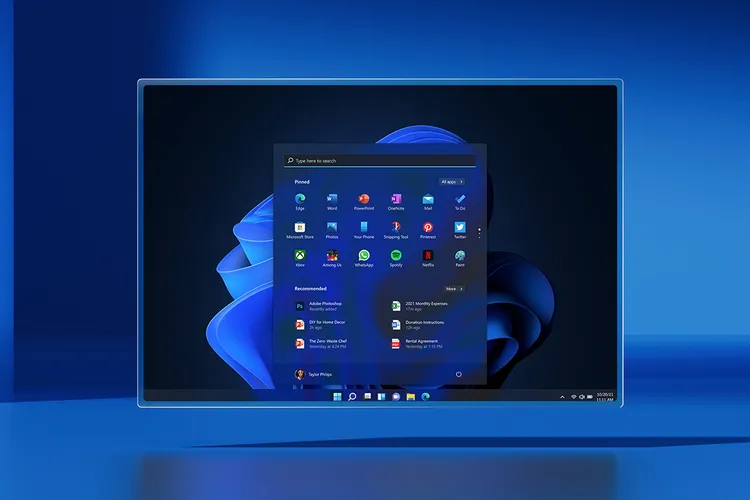
windows 11 darkmode

How to customize taskbar your Windows 11

If you’ve recently upgraded your PC from Windows 10 to Windows 11 You may notice that your taskbar isn’t as flexible and maybe not as effective as it was prior to the upgrade. For instance, the old popular Start menu, with its customizable Live Tiles is now gone.

The search bar is no longer in the taskbar but can be accessed by clicking first on the Start menu, which is an additional step. (Although it is true that Cortana does not include in the search box is regarded by many, at the very the very least, as an advantage.)

Right click on an active icon and select “Pin to taskbar”

Another thing to note is that the taskbar has been permanently attached to the bottom of the screentherefore if you’re more comfortable placing it placed on top on the screen the opposite side of it, then you’re out luck.

As you can suppose, Windows users are already offering fixes to at the very least some of these issues provided you’re comfortable with tweaking the settings in your Windows Registry. For instance, there’s a registry which claims to allow you to change the position of the taskbar up to the highest point on the display and another one that allows you to alter how big the bar appears. These apps allow you to personalize Windows 11 to bring the taskbar back to life.
The possibility is that Microsoft will restore certain capabilities in the future updates of this new OS. In the meantime, let’s focus on the ways you can modify the existing Windows 11 taskbar.

Add an app to the taskbar

You can also pin an app to your tasks from the “All apps” menu.
Pinning an app to the taskbar near the bottom might be a bit, strange. There are a variety of options to deal with it:

If an application is currently running the icon of that app will appear in the taskbar and have the line below to indicate that it’s active. If you would like the icon to remain on the taskbar after you close it, click right-click on the icon and choose “Pin to taskbar.”
Right-click on the active icon and choose “Pin to taskbar”
If the app isn’t working but the icon for it is visible on your desktop, there’s a way to pin the app onto your Taskbar too. Right-click the desktop icon, then click to “Show more options.” A more extensive menu will pop in the middle; approximately two-thirds down will be “Pin to taskbar.”

It is also possible to click”Start,” click”All apps,” click on “All apps” button, and then right-click the app you’re looking for. If you do not find “Pin to taskbar” in the menu that appears choose “More” and you’ll see “Pin to taskbar.”
You can also pin an app on your taskbar using menu “All apps” menu.
Uninstall an application from the taskbar
The majority of apps are easy to get rid of: simply right-click on the icon and choose “Unpin from the taskbar.”

Some icons require a bit more effort to get rid of. It’s the Start Menu icon, which is as would be expected, not removable. However, there are four additional icons that cannot be removed, but they can be concealed. The easiest method to accomplish this is:

Right-click to open the taskbar.
Choose “Taskbar settings.” (You may also find it by clicking “Settings” > “Personalization” > “Taskbar.”)
Switch off the icons for icons – “Search,” “Task view,” “Widgets,” or “Chat” — that you wish to block.

You can hide four of the standard taskbar icons.

You can block four of the common icon icons for the taskbar.
Your icons should be moved to the left
People who have used Windows 10 (or 7 or older versions) have a habit of using the Start menu from the lower left edge of their screen. If you find that your memory of muscle is causing your hand to drift to the corner and you want to change it, move the icons in the center of the screen so that they’re left instead.

Right-click the taskbar, then select “Taskbar settings.”
Click “Taskbar behaviors.”
Search for “Taskbar alignment” and click on the to the right, where it reads “Center.” Select “Left” instead.
Close the settings screen, and you’ll notice that the icons for apps in the taskbar are now to the left, along with icons for Start Menu located in the corner.
You can drag icons from the left to the center on the taskbar.

In addition in addition, the “Taskbar behaviors” section of the settings allows you to change more than simply moving them to your left. You can also disable the taskbar (something which has been a function of the taskbar for a long time) and display an indicator on apps with taskbars to inform you if you’re able to see unread messages, manage the way that the taskbar functions on different displays and display an uncluttered desktop by clicking in the right-hand edge on the taskbar.

Taskbar behaviors include hiding the taskbar as well as showing messages that have not been read.
Overflow icons for the Taskbar and corner icons
Although the taskbar’s icon for the corner and an overflowing display don’t have a new look I’ve never really understood what they were prior to that. To be honest when I first heard the term “Taskbar corner overflow,” I imagined a plethora of icons for apps spilling out of the screen similar to Niagara Falls.

It turns out that the corner icons are actually the ones located in the right-hand corner of your taskbar the ones that display the time and date, battery status as well as your volume level and Wi-Fi status as well as other information. The overflow icon is the small pop-up menu which appears when you click the arrow left of these corner icons.

You can move the icons from the center to the left of the taskbar.
In the majority of cases the icons that populate the overflow windows are intended to alert you whenever there’s something that has to be completed or messages are arriving or updates are required. This is especially useful for applications, like Discord that typically is running in the background. you can turn them off without difficulty by right-clicking the icon and then looking for the “quit” selection.

Although most corner icons included in Windows are fixed, some include the Pen menu and the Touch keyboard and the Virtual touchpad — which may be hidden. They are accessible on the taskbar settings menu which lets us change icon to the left. simply click on “Taskbar corner overflow” and switch off the icons you don’t want to be seeing.

The menu for overflow lets you manage applications that are running on the background.

Taskbar behaviors include hiding the taskbar and showing unread messages.